

In April 2022, the Indian Government issued a new law requiring VPN providers to collect and store user data for a minimum of five years. The order was issued by India’s Ministry of Electronics and Information Technology (MeitY) and the Indian Computer Emergency Response Team (CERT-In). The collection of data actually goes against the purpose of a VPN. VPN stands for Virtual Private Network, so not really private if the logs are saved somewhere for 5 years.
The government initially gave all the VPN providers 60 days to comply and then extended it another 90 days till September 25, 2022, to comply. My VPN provider TunnelBear did not want to comply and stopped doing business in India. They basically told me to fu*k off, okay then.

I was debating what to do and looked at the other VPN providers like NordVPN, ExpressVPN, Surfshark, and many others. But, it didn’t make sense to use a VPN provider that would be logging all my data for 5 years. So, I took up the challenge of setting up my own VPN server.
The first decision was to see what open-source VPN server software was available. I found 3 options – OpenVPN, Outline, and Wireguard. I decided to move forward with OpenVPN since it’s one of the most widely used VPN software packages around.
Next up was the decision of which cloud provider to use to host the software. I didn’t want to go down the path of a full-blown AWS EC2 instance, I was thinking more along the lines of Lightsail from AWS, Digital Ocean, Linode, or Vultr. All of them had really cheap servers that I could spend anywhere from $3.50 to $10 a month and that would be enough for the amount of VPN traffic I would be pushing through. I settled on a really cheap $3.50 a month server from AWS Lightsail.

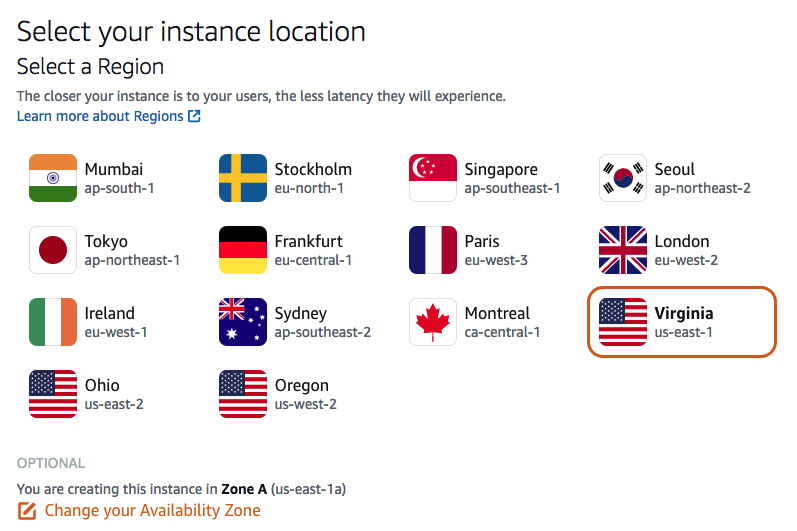
Step 1: Select the region
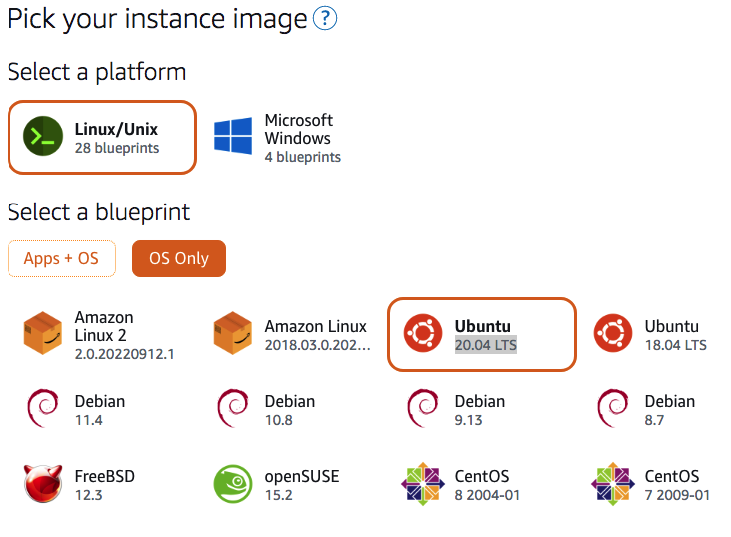
Step 2: Select the operating system
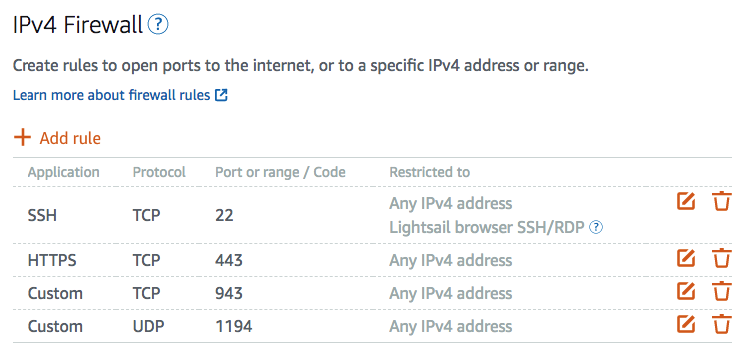
Step 3: Get a static IP and add firewall rules
Step 4: Run a bunch of CLI commands
Once you reboot the Lightsail instance, connect via SSH and run the following commands:
sudo suapt install ca-certificates wget net-tools gnupg -y
wget -qO - https://as-repository.openvpn.net/as-repo-public.gpg | apt-key add -echo "deb http://as-repository.openvpn.net/as/debian focal main">/etc/apt/sources.list.d/openvpn-as-repo.listapt updateapt upgrade -yrebootThen reconnect to the server via SSH and finally install the OpenVPN server software using the following command
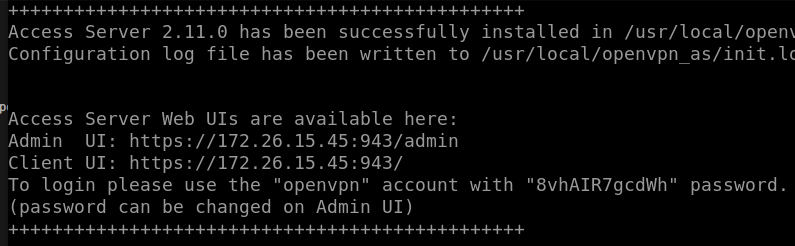
sudo apt install openvpn-as -yStep 5: Connect to the OpenVPN admin panel
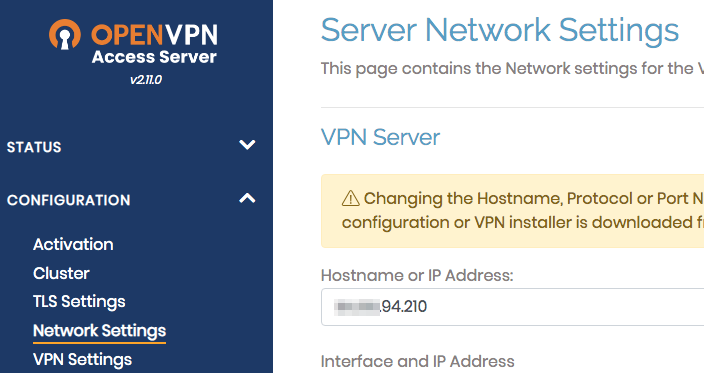
Once the installation is complete you will see the following screen with the login credentials to the OpenVPN Admin Panel. You will need to replace the IP address shown with your static address, https://your_static_IP:943/admin
Once you login to the OpenVPN Admin panel you will need to change the IP address to your static IP address.
Then you can add a user and then it will prompt you to restart the software via the admin panel.
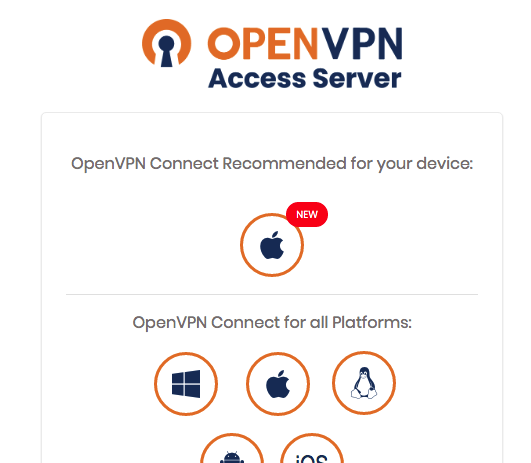
Step 6: Download and install the OpenVPN client
Connect to https://your_static_IP:943/ using the user credentials you just created in the above step. Once you are logged in, it will tell you which OpenVPN client to download.
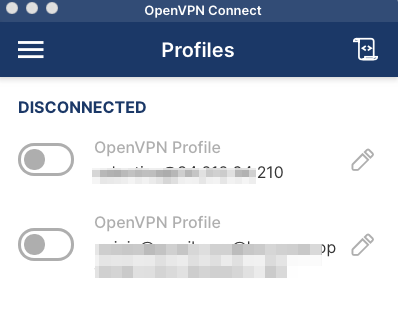
Step 7: Connect and verify the IP address has changed
Once you install the local client it will have your credentials already in it and you just have to start the VPN connection.
To double check if your IP address has changed visit this excellent site from Cloudflare called Cloudflare Radar. Check the IP address before you start the VPN connection and then check again after the tunnel is up to see if it has changed. If it did change…congrats!
After setting all of this up, I wish I had done this earlier but sometimes you just need an event to make you do something. The following YouTube Shorts sums it up:
